Hello and Welcome
to my blog I have been using PSP
for many years
I have also used photoshop
I hope you find something on my blog
to create with.
if you download from my blog,
please leave me
a Thank you comment.
Thank you!♥
Hugs and Blessings
Punky
♥ Link to me ♥
My Blog List
Thursday, January 19, 2012

I wrote this tutorial and posted it in a psp forum
I belong to, and decided after not having any mojo
right now to offer you any templates I thought I'd
Post it here for y'all xx I hope you like it
and comments are appreciated xx
I haven't written a tutorial in a very long time lol
so if you have any problems with it please email me
Sexy Lil Devil was written by me Punky Butts on Oct 25th 2011
Any other similarity is purely coincidental
and was done in psp 9 Any other versions should work
This tutorial was written for those
that have working knowledge of psp
Tools and Supplies Needed
PSP
PTU Scrap Kit by Kristin - Sexy Lil Devil
You can Purchase from her store HERE
Template 151 Toxic Desirez
You can download HERE
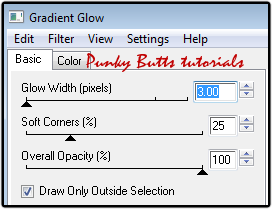
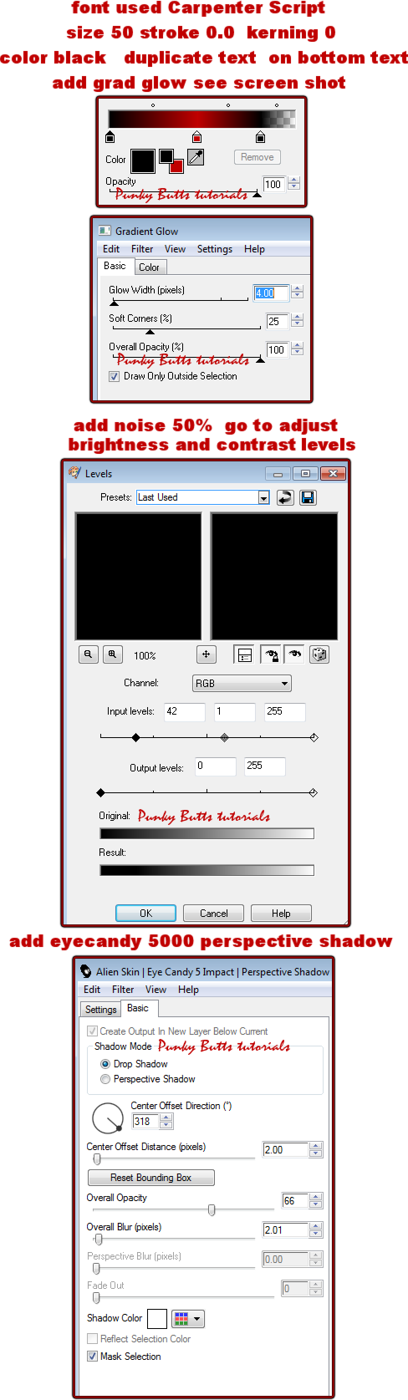
Font of choice I used Carpenter Script
Tube of choice
I used the art of Keith Garvey
you will need to purchase a license to use his art
you must not use the same image in the tutorial
unless you have the appropriate artist license to do so
Keith Garvey can now be purchased at CDO
You can find that HERE
Plugins Used :
Eyecandy Gradient Glow - I used Eyecandy version 4000
Alien Skin Xenofex 2 Constellation
Filters Unlimited 2.0 Gradients
If you do not have these filters - they are optional
you can use your psp gradients instead of the filters unlimited
by making a new layer and filling with a gradient of choice
deleting the original template layer
Ready Let's Start
You may want to grab some coffee lol
and remember to save often as a psp file as to not lose your work
incase your psp decides to lock up & crash!
Open PSP
Open Template - Shift + D to duplicate
close out the original template - delete the credit layer
Stand on Left Circle 1 to make it the active layer
on your materials Palette set the foreground to black
and the background to #c00000 - go to filters unlimited 2.0
Gradients - Linear Waves - Using the sliders
set Direction to 189 and Frequency to 131
Duplicate Left Circle 1 layer make sure now to stand on the original Left Circle 1 layer
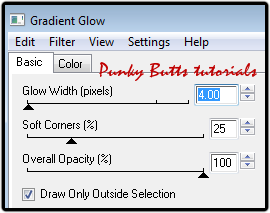
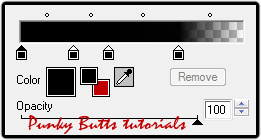
go to effects - plugins - eyecandy gradient glow I am using eyecandy 4000
see screen shot below for settings
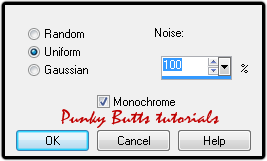
now go to Adjust - Add/Remove Noise - see screen shot below
Stand on Left Circle 2 layer - selections - select all - float- defloat
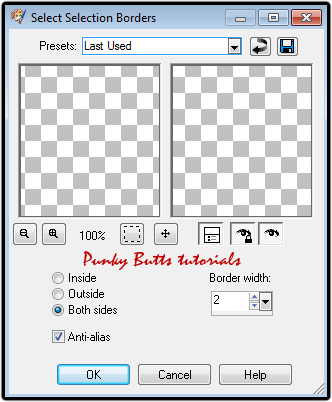
selections - Modify - Select Selection Borders see screen shot below
Add a new layer above Left Circle 2 layer flood fill black
selections - select none - add the same noise you last used
rename this layer Left circle frame 1
Stand on Left Circle 2 layer - selections - select all - float- defloat
selections - Modify - Contract by 1 - now stand on the Pixel Words Left layer
and paste your tube of choice as a new layer and position where you want it
you can lower the opacity on the tube layer to see where it positions best
I used one of the closeups - when happy with your placement
selections - invert - hit delete on your keypad - selections - select none
set this tube layer opacity to 40
Add drop shadow to Left Circle 1 layer and Left circle frame layer
0 0 40 8
Repeat steps above for Right Circle 1 and Right Circle 2 layers
when adding your tube to the right circle I flipped my tube and
opacity to tube 40
Add drop shadow to Right Circle 1 layer and layer Right circle frame
0 0 40 8
Stand on the Dotted Lines 1 layer - add drop shadow of choice
Stand on Lrg Rectangle layer - Selections - select all float - defloat
add a new layer and flood fill with #940000 - selections - select none
Duplicate this layer - stand on the original - add the same gradient glow
and noise and drop shadow 0 0 40 8
Stand on the Oval layer - selections - select all - float- defloat
copy and paste Paper 5 as a new layer - selections - invert
hit delete on your keypad - selections - select none
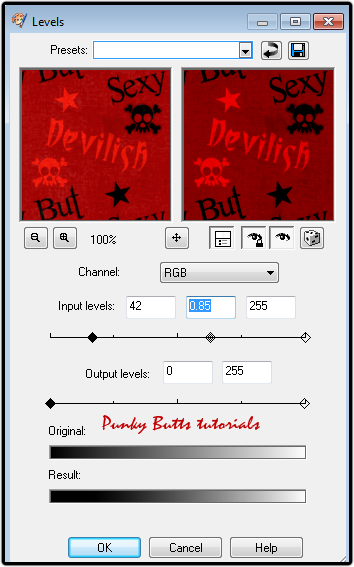
delete the original oval layer - I darkened the paper a bit
go to adjust - Brightness and Contrast - Levels - see screen shot below
Duplicate this layer - on the original oval layer add the same black
gradient glow and noise and drop shadow
Stand on the Thin Rectangle layer
go to filters unlimited 2.0 add gradient setting of choice
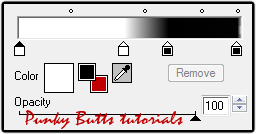
duplicate this layer - add a black and white gradient glow
on the original Thin Rectangle layer - add noise to this layer 50%
see screen shot below
- you can brighten this up a bit using levels
add drop shadow
on the copy of this same layer add noise around 25 or 35 I added Alien Skin Xenofex 2 Constellation
settings of your choice
Delete the Sm Stars and Dotted Lines 2 layers
Stand on the Lrg Stars layers - go to filters unlimited
gradients add gradient of choice and make sure your
foreground is black and background #c00000
Duplicate this layer on the original layer add noise 100%
and gradient glow of choice I used a red and white glow
on the duplicate add noise around 35%
Now it's time to add the elements - I know it seems like a lot
but once you know all the neat lil tricks to designing a template
it goes by pretty quickly and the results are worth it xx
Open Kristin - Sexy Lil Devil - Filmstrip
copy and paste it as a new layer - resize it by 90% smart size
and line it up above the wordart layer
click inside each of the squares with your magic wand tool
keeping your shift key pressed as you click in each one
selections - modify - expand by 2
add a new layer below this layer and flood fill any color
go to filters unlimited 2.0 gradients settings of choice
copy and paste your tubes in the squares - selections - invert
hit delete on your keypad - selections - select none
erase bits of tubes that go into another square I used my selection tool
I set the opacity of the tubes in the left and right film squares
to 30 and the middle squares set it to 46
To get the wordart in the filmstrip colored I used my selection tool
and drew carefully and added a new layer below the filmstrip
and filled with a white and red gradient
Duplicate the film strip and add a gradient glow of choice
I used a white and red add drop shadow to this layer
Open Kristin - Sexy Lil Devil - Barbed Wire - resize of choice
copy and paste it as a new layer just above the wordart layer
Now I don't remember the exact settings I used
but I used Mura Meister - Copies then set the blend mode to Luminance (L)
Open your main tube copy and paste at the top of your layers
as a new image and position - see mine for example - resize if needed
duplicate tube on the top tube layer set blend mode to Overlay
add drop shadow to bottom tube layer - Move the Wordart by the head
of the tube see mine - I added a gradient to the wordart
using filters unlimited 2 and drop shadow
add any other elements of choice resize as needed drop shadow
if using Kristin - Sexy Lil Devil - Sparkles I set the blend mode
to some of them to Dodge - make sure you clean up your sparkles
going outside onto the canvas - I used my selection tool and make sure
your on the right sparkle layers - I made the canvas background layer black so I could see what went outside
and just a tip make your canvas 1000x1000 to clean up tubes and papers
outside onto the canvas so you have a clean final image when you save
and be sure to be on those layers you need to clean up using your selection tool hitting delete and selecting none for each clean up
add credits and your name
for name I used these settings
Now time to save your creation xx
save your creation in layers
so if you want to go back and edit
or add names save as a psp file
and to save image with name added to it
close off the background layer
click on any other layer - edit copy merged
paste as a new image - copy image again
edit paste as a new image and it will crop perfectly
save as png and your done xx
Thank you for doing my tutorial
Hugs Punky xx

Subscribe to:
Posts
(Atom)